National Braai Day

South Africans love public holidays; we celebrate our Constitution, landmarks in our political history, and even a few cultural pastimes like National Braai Day ... yes, we take a whole day off work to celebrate our braai culture. (Technically it’s Heritage Day, but that’s close enough.) A braai is always a good idea in South Africa, no matter the weather, day of the week or time of the day. To braai is not the question as the answer is almost always yes. The questions are what will be thrown on the grill, what beverages will be consumed and what snacks will be served for the occasion.
Best type of meat to use for your braai?
Chicken: Although some may regard chicken as a vegetable, its lean white meat can be quite succulent. Chicken takes the longest to cook, so braai it over moderate coals and turn it regularly. For added flavour, use a rosemary sprig instead of a brush to baste it.
Pork chops : Pork is lean and cooks fairly quickly, but it dries out just as quickly. It is at its best when marinated, basted, and seasoned. Pork shoulder and pork neck are fattier, juicier cuts to braai.
Lamb chops: The unmistakable aroma of lamb chops on the braai is known to cause hyper-salivation. A great idea to get the best out of your chop is to skewer and stand the fat side down to crisp and seal it. Remove the skewers, add a squeeze of lemon juice and braai as normal (the lemon tenderises the meat and enhances the flavour).

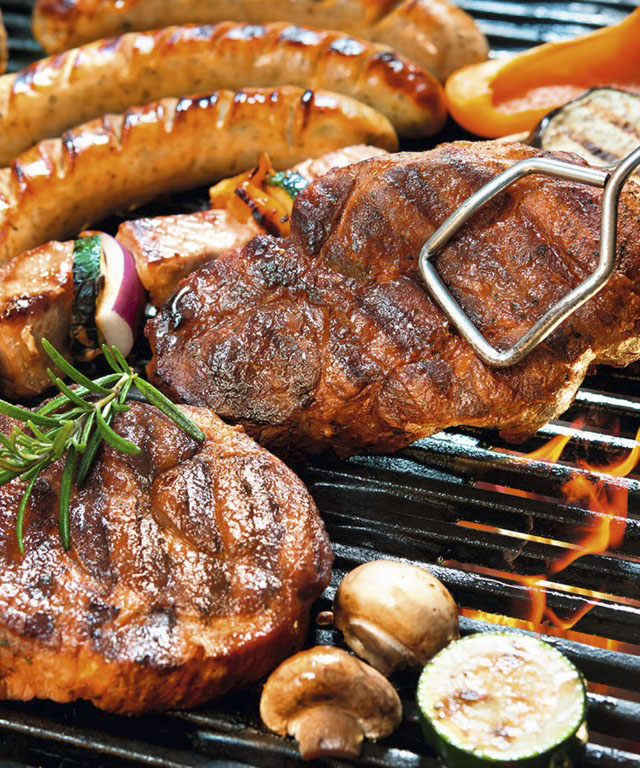
THE BEST BRAAI CUTS

The best beef cuts for braaing are fillet, sirloin, rib-eye, prime rib, T-bone, porterhouse, rump and tenderised steak. Overcooking will make the meat dry and quite tough. Sirloin is a part of the loin and has a distinctive layer of fat on top that adds flavour to the piece of meat while cooking. Then there’s also lamb chops, chicken and fish, and do not forget the boerewors and sosaties (kebabs) which are based on a Malay dish. To make sosaties, thread cubed lamb or chicken pieces onto metal or wooden skewers with red pepper pieces and onion slices and marinate them for a few hours before cooking.
Snack attack - Empty a tub of full cream plain cream cheese into a container. Squeeze your favourite sweet chilli sauce into the cheese (don’t be stingy) and stir. Put it in an attractive bowl in the centre of your chips or biscuits and, voila, you have a delicious dip.
WOOD, CHARCOAL OR GAS?
So, let’s start with the elephant in the room: gas or wood/ charcoal? Let’s stick to facts and not let the emotion of ‘How can you call it a braai if it’s on gas?’, get in the way, and mutterings of ‘There’s no ritual in gas braaing’ that can already be heard. Fact is, very little difference in taste can be detected between the two. Wood and charcoal burn hotter. A hotter fire is way better for red meats as it allows for a crisp outside and a red/pink inside without overcooking the meat. Both wood/ charcoal and gas will have a time aspect, and they both work in opposites. With braaing, the longer the better. It’s true, wood or charcoal braais have the cosiness of a real fire, while gas may appear to be more clinical, but both get the job equally well done. There is a minor difference in the flavour imparted by combustion gases, the volatile byproducts given off by the burning of the charcoal or the gas. When propane combusts, it makes more steam than charcoal, and some say that keeps the meat moist, giving gas an advantage. Others think the steam is a disadvantage, preventing chicken skin from getting crisp. If you’ve decided to go the gas braai route, bear the following in mind: do not be confused by the number of brands and variety of products available. Be clear about your requirements. Added features like rotisseries and side burners could be very convenient when moving all the cooking outside. Easy storage of your gas cylinder and a cover to protect your braai from the elements are a must as well.

DID YOU KNOW?
Across race, language, region and religion, we all share one common heritage. It is called many things: ChisaNyama, Braai and Ukosa, to name just a few. Although the ingredients may differ, the one thing that never changes is that when we have something to celebrate, we light fires and prepare great feasts. We encourage all South Africans to unite around fires, share our heritage and wave our flag on 24 September every year.

Avocado braai salad (Paleo/ vegan/ gluten-free)
Halve avocados and toss gently with cherry tomatoes, grilled sweetcorn, kidney beans, chopped chives and peppadews. Serve with a squeeze of lime juice and freshly ground black pepper.

Try this for sosaties
2 large chopped onions; 125ml white vinegar; 375ml dry wine; 2 bay leaves; 15ml sugar; 5ml curry powder; 30ml coriander; 10ml salt; 2ml cinnamon; 2ml cumin Method: Heat all the ingredients in a pot, allow to cool. Pour over sosaties and leave to marinate for a minimum of 24 hrs. Braai over hot coals.

Try this beer marinade for steak
25ml paprika; 4 garlic cloves; 250ml of your favourite beer; 30ml Worcestershire sauce; 30ml Dijon mustard; 15ml dried thyme; 15ml lemon juice; 15ml brown sugar; 4 rump steaks METHOD: Combine all ingredients. Pour the sauce into a dish and add the steaks. Turn the steaks to coat well. Marinate for three hours at room temperature or overnight in the fridge. Remove from the marinade and braai over hot coals for 8 to 10 minutes, depending on the thickness of the steak.

How to braai the ultimate steak
• Blue rare (bleu): very red and cold (and no point in having a braai)
• Rare (saignant): cold red centre (still no point in wasting good wood)
• Medium rare (à point): soft, warm, red centre (hmmm…to melt in your mouth)
• Medium (cuit): pink and firmer (still has mouth-watering potential)
• Medium well (bien cuit): small, pink centre (meat shouldn’t sit longer than this stage if you still want to enjoy it)
• Well done: grey-brown throughout (if you like the taste of charcoal)
• Overcook: blackened and crispy throughout (waste of wood and food)
Steps to create the best braai temperature:
Step 1: Gather the materials
Get everything ready – firestarters (convenient and widely available), but you can also go the traditional route and use tinder (newspaper, small dry bark/sticks). Then add the kindling (dry, medium-sized sticks, about the length of your forearm; it works well). To round it off, add hard, dry logs of wood, and you are ready to go. Don’t forget the braai tongs and a sharp knife.
Step 2: Start the fire
Place half of the kindling in the centre so that it looks like a mini bonfire. Light the tinder (or firelighter) and place it on the kindling. Then, put the other half of the kindling on top of the burning tinder. Once a small fire is crackling away nicely, place the bigger logs around the kindling so that they form a small square tower. Do this by laying two pieces down on either side of the kindle, parallel to one another. Then place two more pieces of wood on top, but perpendicular this time. Build three or four layers like this and your perfect braai fire is well under way!
Step 3: Maintain the flame
This is arguably the most important part of the fire-building process and the fire needs to be watched intently. Make sure the fire is burning properly and has enough space to breathe. Stack too many pieces of wood and you’ll suffocate the fire; place too few and it will die. You’ll know a healthy fire when you see it, as the flames will be as high as the logs you are using. (But there is no set rule here.) The ultimate technique for maintaining a great fire is to create feeding systems; build the fire on one side and when the coals form, pull them over to the area you want to cook. Keep adding logs to the main fire – this will create a constant supply of coals to keep the area below the grill at the perfect temperature.
Step 4: Place the meat
A fire can take anything from 30 minutes to two hours before it reaches the correct braai temperature. Wait for a bed of hot coals to form and distribute them evenly below the section of the grill you’re going to use for the meat. To ensure the temperature is just right, hold your open hand a few centimetres above the grill; if you can keep your hand there for five seconds, you can put the steak on the grill. Seven or eight seconds means it’s ready for boerewors, and 10 seconds for chicken. Do not turn the meat too often, as it can become tough and dry (except for boerewors). As a general rule, you should flip the meat when the juices surface.
Step 5: Enjoy!
Now you’re ready to dish up the meat, grab another drink and enjoy the awesome occasion of a South African braai!


